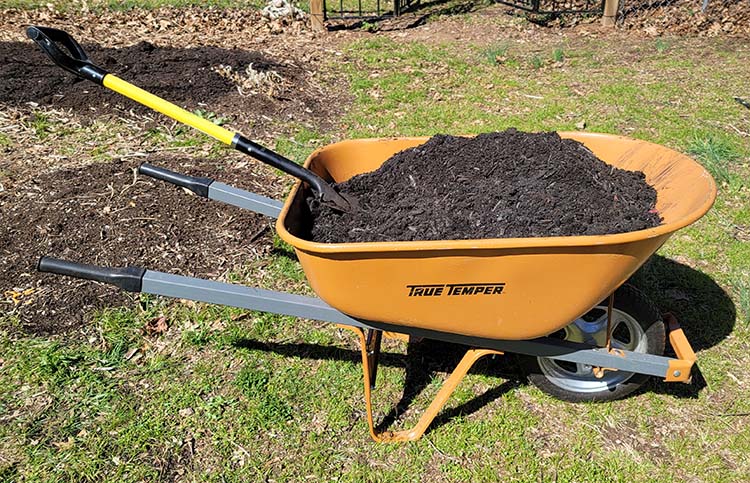
To prepare the soil in my garden beds for Spring Planting I do the following: clean up the Fall and Winter debris, lay down cardboard mulch in any areas where the grass or weeds have grown through; add a 2 inch layer of purchased compost; add soil amendments like Alfalfa pellets and Bone Meal; And add a one inch layer of homemade compost.
I follow the same process for creating new beds as well. The only difference is you have to lay down cardboard every where you do not want grass or weeds to grow. In other words, the area that you want to turn into a garden bed.
I follow the no dig approach championed by the U.K.’s Charles Dowding. That means I do not dig up the old soil, I simply add soil enrichment on top. I do mix the new additions together being careful not to go so deep as to disturb the existing soil structure. For more information about the No Dig Method, watch the YouTube video below from Charles Dowding.
Clean Up Fall And Winter Debris
I do not clean my garden beds until late Winter/early Spring. There are large Oak trees growing at the back of the property and they will cover the back yard and garden areas with leaves in the Fall. I let the leaves over winter on the ground for protection for perennials, shrubs and trees. Then when the weather starts warming up and just before outdoor planting time, I rake these leaves out of the beds and into piles, then run over them with my lawnmower to mulch them, then put them in my compost pile. I also pull out the remains of any annual plants from the previous growing season. I remove any sticks or twigs that have wound up in the beds and put them in a yard waste recycle bin. These are picked up weekly by my city and used to create compost for city residents.
Use Cardboard Mulch to Kill Any Unwanted Grass And Weeds
If grass or weeds somehow found a way to grow through the composting and mulching of the previous year, I lay down cardboard over it to kill it out for the coming year, wet the cardboard down with the garden hose, and then add the compost and amendments on top of it. The cardboard will disintegrate but not before killing out grass and weeds. After the plants have been placed in the garden beds, I mulch around them with wood chips to help keep moisture in and stop weeds and grass from growing. The wood chips break down over time and enrich the soil as well.
Add A 2 Inch Layer Of Compost

The first Saturday in March, I travel to our city’s Composting Facility in my small truck. You can purchase a yard waste compost for $25 and a food waste compost for $35, plus tax on both. These are charged by the scoop. One scoop fills the bed of my small truck. I use one truck load of food waste compost to top off my garden beds. The food waste compost Is more nutrient rich than the yard waste.
I top off each of the garden beds with 2 inches of food waste compost after they have been cleared of winter debris. I have used this compost for several years without any ill effects to my garden beds. In other words, it doesn’t have pests or weeds buried in it.
If you do not live in a city that provides compost, check with landscaping companies or local nurseries to see if they provide this service. For an additional charge, some of them will deliver to your location. You can also purchase it at Lowe’s and Home Depot.
Add Soil Amendments
Alfalfa Pellets

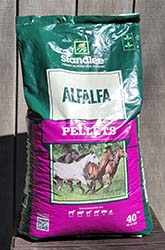
I purchase and add two main soil amendments to the beds on top of the compost layer. I sprinkle a layer of alfalfa pellets which will break down and feed the soil over the coming months. Alfalfa pellets provide nitrogen and other micronutrients to the soil. According to Krissy Howard in her article, ‘What Does Nitrogen Do For Plants?’ at hunker.com, “Nitrogen helps plants photosynthesize, which is a process that involves using energy from the sun to break down water and carbon dioxide so that sugars are formed. These sugars are then used as food for the plant, and the byproduct of the process is oxygen.” She goes on to say, “Nitrogen plays an important role in the health and growth of all plants, and it is responsible for the green leaves you see growing on them.”
I picked up the suggestion to use Alfalfa Pellets from Gary Pilarchik on his YouTube Channel, The Rusted Garden. I’ve included a video below with instructions on how to apply Alfalfa Pellets. I recommend that you follow Gary for this and many more gardening tips.
If it hasn’t been raining and the garden beds are dry, I water them with the garden hose to help the start the breaking down process of the alfalfa pellets. I purchased the 40 lb. bag of Alfalfa Pellets (shown above) at Tractor Supply for $16.99.
Bone Meal

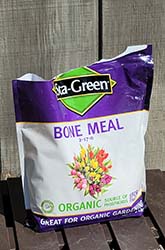
Next I add a dusting of bone meal. Bonemeal provides phosphorus for the plants. It cannot be immediately used by the plants, but will be broken down by soil organisms over the coming months and become available. According to Greenway Biotech, Inc., a manufacturer of soil amendments, “phosphorus stimulates root development necessary for the plant to get nutrients from the soil, and is required for photosynthesis and also in the storage and transportation of the nutrients throughout the plant.” Click here to read more about phosphorus from Greenway Biotech, Inc.
After sprinkling the bone meal across the garden bed I mix it into the soil with my hands. I purchased the 3 lb. bag of Bone Meal shown above at Lowe’s for $7.58.
Once again, I picked this tip up from Gary Pilarchik. I have included one of his YouTube videos about Bone Meal below.
Add A 1 inch Layer of Homemade Compost
The compost I make takes anywhere from 6 months to one year to reach the consistency that I desire to use. It is made up of mulched leaves, grass clippings, paper shreds, torn cardboard, coffee grinds and filters, tea bags, banana peels, egg shells, and kitchen waste like potato peels or other vegetable or fruit pieces. I do not add meat or dairy. Over the months as I build a pile of compost, I will add alfalfa pellets when no grass clippings or other green type materials are available.
I try to stir it with a pitch fork once or twice a month but if I don’t, I do not stress about it. The materials will still break down if not stirred only it will be at a slower pace. During periods with little rain, I soak the pile with the water hose every 2 weeks or so. If it rains I stop until it dries out again.
I use the finalized pile of homemade compost and add an inch layer to my garden beds. I find the materials help to improve the soil structure and hold moisture. I also add this to potting mix, peat moss and vermiculite for seed starting and for use in planters.
If you have space, I recommend that you create your own compost. You will be amazed at just how much food scraps, yard waste, etc., that you accumulate. It makes sense to take these free items and use them for your gardening benefit. Do a YouTube search for ‘how to compost’ and you will find more videos than you’ll have time to watch.
When Plants Have Been Added, I Mulch
The information above describes what I do to prepare my garden beds for the Spring plants. As I plant the seeds or small plants, I first add slow-release organic fertilizer to the are beneath and/or around where each plant will break placed. I use whatever slow-release organic fertilizer that I have on hand. Once the plants have been added, I mulch around them with wood chips. These wood chips are also purchased from my city but you can find them at Big Box Stores as well. When I have them, I borrow a small wood chipper from a friend and mulch small branches and twigs from my yard. The small wood chipper can handle limbs one inch diameter and below. I hope to one day purchase a wood chipper that can handle larger limbs but at this time, it is a purchase that ranks way down on my priority list, and does not fit into my current budget.
Summary
As stated in the title, this blog describes what I do to prepare my garden beds for Spring planting. The process I have described works for me, in my area, and for the way I garden. You will find your own process which may or may not be similar to mine. Feed your soil if you want it to feed your plants. If you have any tips or suggestions on preparing the soil for Spring planting, please tell us in the comment section below.

